
Buy any size canvas. I used 5" x 5" gallery wrapped so there were no staples on the sides.

Resize and crop your favorite photos so they're the same size as the canvas and print the photos on your home printer.
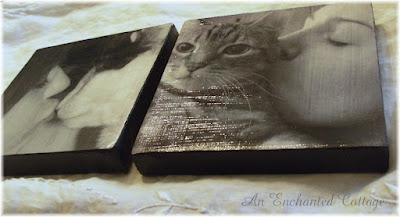
Paint the sides of the canvas whatever color you'd like. I chose to print my photos in black & white rather than full color, so I painted the sides of mine black.
Apply decoupage to the back of the photos and then press them firmly onto the canvas. I used a clean paper towel to kind of work the bubbles out and "press" them into place. When dry, I applied one coat of decoupage medium horizontally, let it dry, and then applied a second coat vertically and let that dry. (I think brushing on one coat in each direction gives them a linen-like texture.) The final step is brushing on a coat of high gloss varnish.
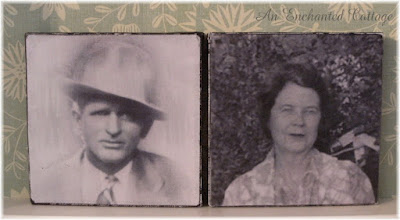
I also made a set of canvas prints for hubby for Christmas. He has very few photos of his parents so I scanned and enlarged some old (small) photos of them.
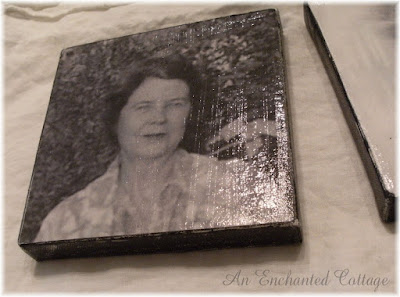
Naturally when you enlarge photos, you lose definition and there is some blurring, but for this project I think it worked to my advantage. I love the way they turned out.
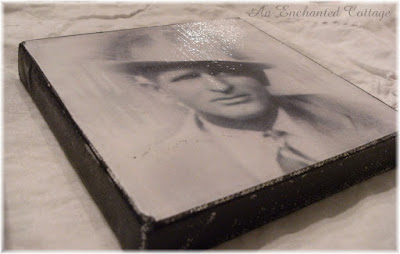
I followed the same procedure as I did for the girls' photos, except I sanded the sides to distress them and give them a worn look...
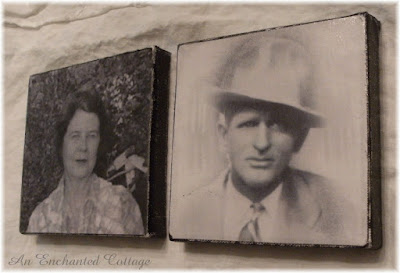
I have one more project to share with you in my next post, and it's one that might come in handy for Valentine's day...
Until then, have a wonderful week!
COMMENT RESPONSE & A LITTLE MORE INFO ON THIS PROJECT:
I had no idea so many of you might want to try this project, so I'm going to answer a question and give a bit more detail:
Decoupage medium can be purchased at any craft store and in most craft sections of department stores. It's a thick, white gluey substance that dries clear, and it allows you to adhere photos, clippings, scrap paper (or pretty much anything) to other surfaces.
1) I have just an inket printer, and their inks do tend to smear. Here's a tip on avoiding that:
For your first application of decoupage medium (whether you apply it vertically or horizontally), make sure you have enough decoupage medium on your brush to make one full pass from side to side so that you're not brushing over the same area multiple times, which could make the ink tend to smear, especially if you're using an inkjet printer. (I believe there's much less smear-potential with laser prints and copy center prints. But if you're careful, it can be done on photos from an inkjet as that's what mine were.)
2) I actually ran out of regular printer/copier paper while working on hubby's parents, so I used some white card stock I had on hand. As it turns out, that weight paper worked just as good (maybe even better!).
3) One thing to watch for after youve applied the decoupage and pressed down your photo is excess decoupage that might have squeezed out. Just wipe it off the sides of the canvas if there are any big gobs or runs.
4) Don't be alarmed that you can't see your photo through the milky white decoupage medium at first. It ends up drying completely clear.
5) And lastly, I had to completely redo one of my first attempts because I applied decoupage medium to both the canvas and to the back of the inkjet photo before pressing the photo to the canvas. (I think those were the instructions on the back of the jar.) I had so much trouble trying to reposition my photo to get it just right. I found that applying decoupage to just the back of the photo made it MUCH easier to work with. Just make sure you have all the edges covered so they will adhere nicely to the canvas. You don't want the outer edges of your photo popping up from the canvas.
If anyone has any further questions, please feel free to ask. I hope you all have fun!
Donna
Donna


24 comments:
Those are beautiful and what a creative idea. Thanks for sharing.
Awesome! Thanks! Looks great! Cheery wave from Bev!
Donna ~ Oh, these photos on canvas look so wonderful - very classy! And I appreciate the instructions you gave - so helpful and clear. Thanks.
And of course, what precious subjects you photographed - your girls and their precious kitties. Such sweet pictures - what a treasure.
Have a Beautifully Blessed 2010...
Cynthia K. (Beauty and Blessings)
Love that idea. Thanks for sharing.
Susan
Excellent idea! I love the way these turned out. Thank you for sharing the directions. laurie
That looks GREAT!!! I ♥ them!!
oh but do you have a inkjet or laser printer hun?
Thanks for sharing!
Annie x
will link up if I can pull this project off!!
that is such a cool idea, thanks for sharing it, love how they turned out! Cindy
That is one neat idea, Donna! I have to try that - we have so many photos that would look great on canvas. Thanks so much for the tutorial - I have to explore this idea!
xo
Claudia
Loved the photos, Donna. Loved them. You are very crafty. Going to share this post with my daughter who is also an artist. Thanks! Sincerely, Susan at writingstraightfromtheheart.blogspot.com
You are so Clever , thanks for sharing.
I might give that a try.
yvonne
These look wicked...I want to make one! But...decoupage? What is that? Where can you get it? Did you just print the photos out onto paper? xxx
Love these Donna! They look fantastic!
Jill
What a great idea! One I have never seen before. Great job!
Hugs,
Joanne
Oh heavens, you know how much I love decoupage projects!
Brenda
Oh I love those!!! Thanks for sharing! I am going to try this...this week-end!
~Jan
Thanks so much for sharing this! I am definately going to give it a try!
Blessings!
Gwen
Thanks so much for all the extra information. These look like heirlooms, they're wonderful!
Can you use a brayer roller to smooth out the glue???
I love this so much. What a great project.
Sharon Lovejoy Writes from Sunflower House and a Little Green Island
Absolutely LOVE this project!! Thank you so much for sharing it with us!!!!!
Those are so great, very pretty.
I agree with the brushing in one direction and then the other direction, I do that as well and like that effect.
I love this idea! Thank you for sharing!
becky
Donna, This is a great idea! Thanks for sharing! I can't wait to try it myself.
Susan
What a great project! Will be doing this one for sure. Thanks so much!
These are fabulous! Thank you so much for the clear directions and with your instructions I believe even I can tackle this project.
What a wonderful idea.
- The Tablescaper
Post a Comment