Photo Pumpkin Instructions
Comment Response: This project was done on artificial, store-bought pumpkins. I'm not sure how it would turn out on real pumpkins, but feel free to try. Unfortunately, the pumpkins would need to be tossed at the end of the fall season as I doubt they'd keep from year to year...
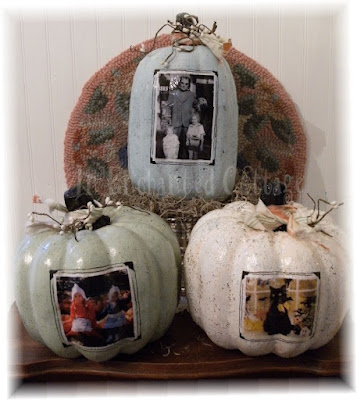
So here we go with the step-by-step instructions! Be sure to let each step dry completely before going on to the next step. (See yesterday's post for the list of supplies needed for this project. I sure wish I could have found white pumpkins rather than orange to start with - it would have saved me a few steps!)
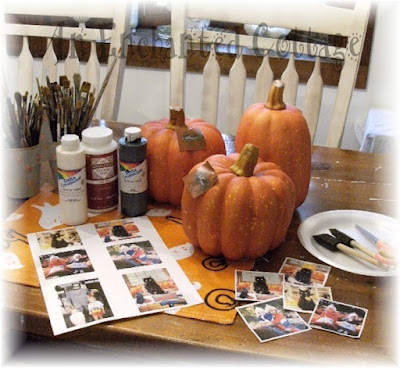
(you can click on any of the photos for a larger, detailed image)
Step 1) Gather your supplies. You can use any size pumpkins, but be sure the copies of your photos are smaller than the height and width of your pumpkins. Trim your photos. I left a thin white border around mine. (Tip: I printed mine on my inkjet printer. You may have some color bleeding with inkjet copies, just as I did, during the decoupage step. I believe there's less chance of bleeding if you use actual Xerox/photocopies from a print shop or photos printed on a laser printer.)
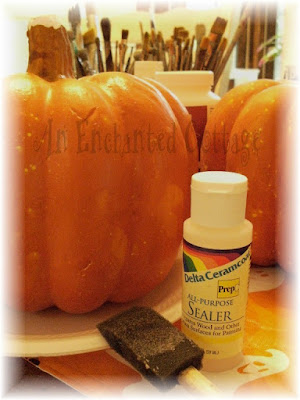
Step 2) Seal the entire pumpkin to keep the color from bleeding through. (Note: The orange of my pumpkins still bled through the new paint job a bit, visible if you enlarge my photos... I don't know if there's a way to stop this completely...Maybe use 2 coats of sealer? I only used one. Luckily, the orange peeking through here and there adds a bit of unexpected character!)
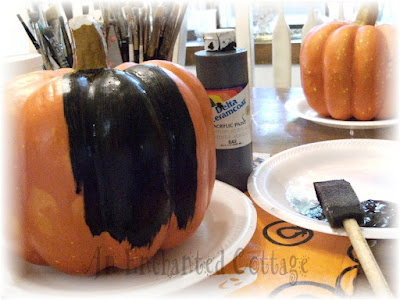
Step 3) Paint the pumpkins Black. It will give you better coverage when you apply your final color over black rather than trying to paint over orange.

Originally I was going to leave the stems natural, but then decided to paint them black. It's a personal choice. If you plan to paint them black, you can do so at this point. (Lisa at The Pickled Hutch said they'd look great having photos added at this stage of the game, too! Now why didn't I think of that?)

Step 4) It's now time to paint the pumpkins with your color choices. I chose white, green, and pale blue. As you can see, I'm starting to paint this one white. (It looks like a bundt cake with icing dripping down, doesn't it?)
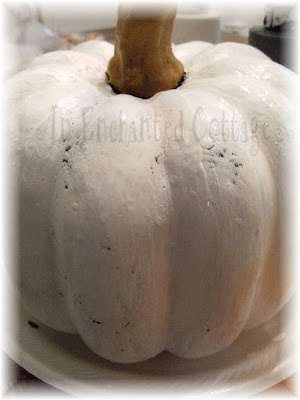
Good enough! Now to let it dry.

Step 5) Choose the first photo you want to use on the pumpkin....

Put it face down on a clean surface and apply a generous coat of decoupage to the back of the photo...
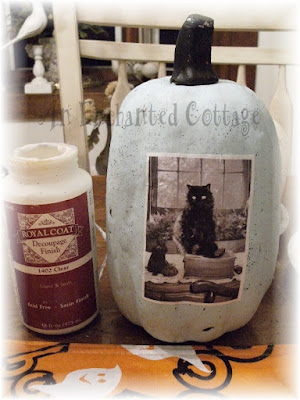
Just eyeball the photo to center it from top to bottom and left to right, and then press the photo onto the pumpkin. While the decoupage is wet, you'll be able to move it around to straighten it. Because of the ridges in the pumpkin, the photo will not lay completely flat. Just do the best you can to press it down into the ridges, and to press the edges down flat. (Sometimes a folded paper towel is easier than using your fingers to press and rub.) Repeat this process for as many photos as you are putting on the pumpkin (I did one on the front and one on the back). If you enlarge some of my photos, you will see that there are slight creases and wrinkles in the photos due to the pumpkin's uneven surface/ridges, but that won't ruin the overall look of the finished project.)

Step 6) When dry, apply one thin (but complete) coat of decoupage over the photos so they are completely sealed. If you over brush the decoupage, it could lead to photo bleeding (if done on an inkjet printer). After you hve applied the decoupage medium, the photos may initially look milky white/foggy. Don't worry. Once the decoupage medium has dried, the images will be crystal clear.
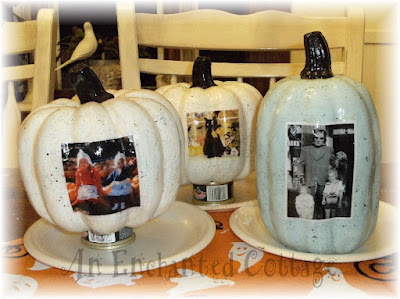
Step 7) Once the decoupage has completely dried, it's time to apply a coat of varnish to the entire pumpkin including over the photos and the stems. I used Delta Interior/Exterior Gloss Varnish, a craft varnish that easily cleans up with soap and water. I set my pumpkins on top of small cat food cans so the bottoms could dry as well.

Step 8) OPTIONAL STEP: Now it's time for you to get really creative! I chose to "spatter" my pumpkins with some black paint, and also paint on some simple black lines and 'vintage' style photo corners around the photos so they'd stand out. But you could do anything at all - vines, flowers, wavy lines, dashes, dots. You could even paint a silhouetted scene around the pumpkin (I want to try that next year!!) You could also paint polka dots or stripes all over! Because you have already varnished your pumpkin, if you make a mistake, it's easy to use a damp paper towel to "erase" a line or whatnot and start over again. (Here's a link to the pink polka dotted pumpkin I painted.)
Step 9) If you did add add any decorative details outlined in Step 8, it's now time to varnish your pumpkins again in order to seal the finished product.
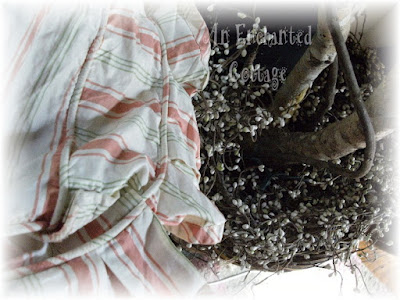
Optional: For the finishing touches, I just ripped some scrap material into short 'rags' for around the stems (I also snipped a few small faux berry sprigs from a garland to tuck in around the rag strip. You could also use ribbon, raffia, or jute if you'd like.
So that's it! I hope you enjoy making your own photo pumpkins!! If you have any questions, feel free to e-mail me...
Donna

23 comments:
Wow! What a great idea! Thanks so much for sharing - I can't wait to get started on mine!
Donna,
This is why you're so popular. You have the most amazing
talent for color, and design. I've never seen anything even
close to this form originality. I think these are delightful. You ROCK.
Mary Ellen
I just found your blog yesterday! These are just ADORABLE!!! Since I started blogging, I have a craft "to do list" a mile long! LOL
.......Now I'm off the read the rest of your blog!!
~Tidymom
Donna~ these are wonderful!! love them! what a terrific idea... thank you SOOOOO much for the tutorial on them, I am off to find me some 'punkins'..... I love your blog header too!
Great idea! Are these real pumpkins or artificial? If they are real, will they last for other years? ~Adrienne~
Congrats to the winners. THANK YOU so much for the tutorial!!! I want to do this someday. Maybe not this year, but someday for sure!!!
Hi Donna :)
Congratulations to Pat and Stacy!
Those pumpkins are so cute!! I love how creative that is :)
Hugs,
rue
These are gorgeous, Donna! I'm especially drawn to the green one ... I love shape as well as the delicious color.
I have a handpainted pumpkins project I think you'll like, using mini pumpkins and small gourds (the bumpy gourds are particulary cool). Come take a peek and, if you have young children, I've also provided links to my Welcome To The Pumpkin Patch page, which has dozens of pumpkin-themed songs, poems, art, and activities for children.
Thanks again for the inspiration!
Victoria
This is fantastic. I love how your pumpkins turned out. The idea of photographs leaves lots of room for inspiration. Karen
AMAZING post!
Thanks for sharing your creativity with us!
:-)
Layla
The Lettered Cottage
What a great idea!!!!!!!
This is a great idea, and turned out so pretty. Thank you so much for the instructions, can't wait to try it. And thank you for the sweet comment on my blog today, I adore my bunnies : )
Kathy
Ohhh I must try this! Thank-you for the tutorial. I don't believe I have ever been to your blog it is lovely...although I shed a few tears reading about Mr. O' malley..we lost our Airdale dog Claude back in Jan. We went to the Humane Society...and found our Riley a black lab..and it has been the best thing we have ever done. You are soooo right about them being appreciative of being saved. We got Riley and a cat we named Calvin and we love them dearly. Have you read Marley and Me? Great book. I will have to read your rec. OHHH and " A tree grows in Brooklyn" is one of my all time faves. cherry
You gave some terrific instructions for completing this wonderful project!!! I thought you did it on a real pumpkin--duh!---but it makes a lot more sense to be able to use it for years to come! (Your photos on the pumpkins are adorable).
Congrats to your LUCKY winners!
These are wonderful, what a great idea. Thank you so much for letting us know how to do this.
Oh! I soooo wanna try that! It looks like a lot of fun. Thank you for the instructions.
Yours came out spook-tacular! I love how they're personalized. Too cool!
K-
What a cute fun project! These are wonderful!
Have a blessed and wonderful day!
smiles, kari & kijsa
Thanks for the lesson, I'll have to bookmark this and come back later. How marvelous, I can start a pumpkin patch and add a new pumpkin every year, with new photos! I love it.
Congrats to Stacy and Pat! You won my prize but I forgive you. Someone had to! LOL
Donna, this is just a great original idea. But I have to say those pumpkins even in black are fantastic! I don't consider myself a "crafty" person but you have made this simple as pie. I'm going to try it!
Lisa & Alfie
Hi Donna!
I just came back from a little vacation as we were celebrating our 34 wedding anniversary and I just saw I won that adorable black cat door mat! Whoo hoo!
I'm so excited and I'll send my address to you ASAP THANKS!!!
Hugs, Pat
Hi, I just found your blog and immediately became a follower. Your decorating sounds just like me. Going through the different decades of design. Guess that shows our age! I am slowly transforming our home to shabby. Going to attempt to make white slipcovers for our couch next. Wish me luck! I've never made them before.
These look really cool, what great ideas.
This is such a cute idea, wondering if the photos are printed on photo paper or regular copy paper? Thanks again for the inspiration..you are truly talented!
Post a Comment