Showing posts with label bird cage planter. Show all posts

Thursday, June 21, 2012

Vintage Bird Cage Planter for the Garden, a DIY project


 I finally got around to setting up this year's bird cage planter!

For a while, it looked like we were going to attempt mounting the bird cage to the top of our birdhouse pole. We honestly didn't think we'd be able to put the birdhouse together again once it broke into dozens of pieces after a winter storm. Thank goodness we were able to save it (blogpost about the birdhouse here).

 It's so easy to make these birdcage planters. Most of the cages have tops that can be removed. If your cage has a tray, take that out so the water can drain out when watering. Just arrange your plants, and if you have any trailing plants (I put a vinca vine in each corner), gently pull the vines through the cage bars.

Once I had my vinca vine and impatiens arranged, I decided to add a garden statue (I should have thought of that before and arranged the flowers around the statue).

I decided on these two lovebirds as they're tall and will still show as the flowers get taller. I just pushed the flowers aside to make room for the statue. (The flowers and vines are all in their original containers from the garden center).

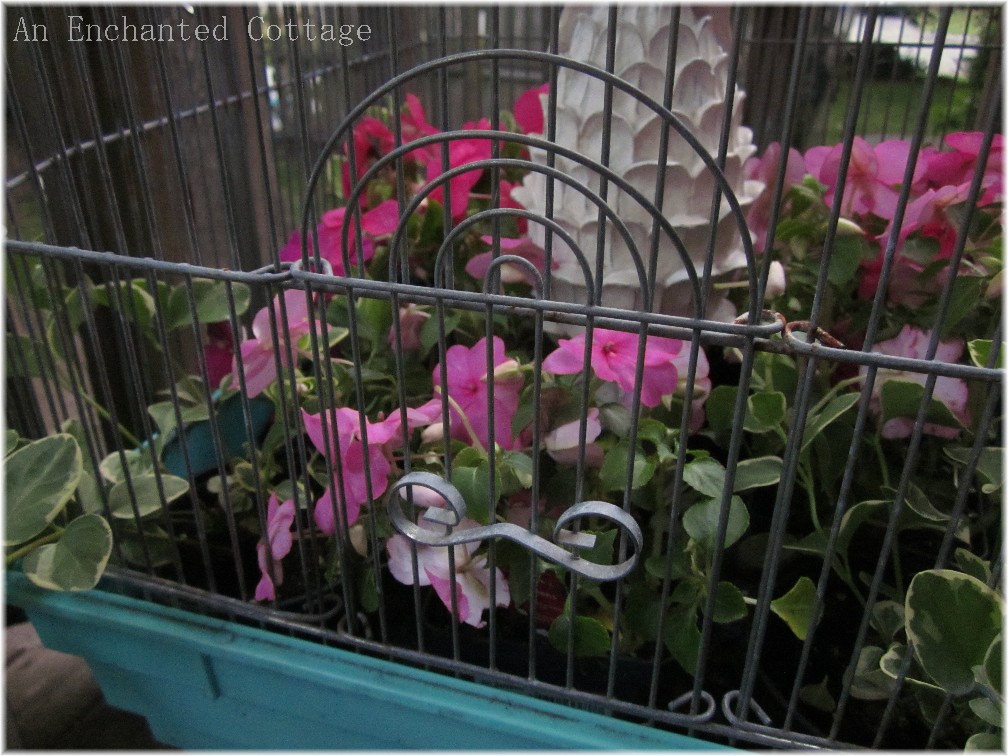
I love the little domed door and ornamental scroll work on the door of this old cage, not to mention the aqua blue base!

 I have an old white table that I use for this bird cage planter every year. It's the perfect size!

 The location on the deck changes from year to year. This year it's over by the fountain, which is also in a different location this year.

 It is so relaxing to sit out here on summer days and evenings (until the mosquitoes crash the party!)

 Generally there's no tablecloth on the table as I'm sure it could easily blow away on a breezy day. But I have several old, vintage tablecloths with minor stains or holes, and they're perfect to throw over the table when we are out there.

 And would you look who's been watching me take photos out here! I tossed a few peanuts in front of the slider and the Chips have been keeping her entertained! They all know by now that she's on the other side of the screen and therefore they're safe!

This is the baker's rack that you see in the background of the previous photo. Nothing special going on here. Just my always reliable impatiens and a few ground cover flats that will get planted in the fall. I love using ground covers for 'display' on the deck and around the yard until they get planted in the fall.

AS a matter of fact, here's another bird cage planter I have down by our swingset deck this year. It's very similar to the cage up on the deck, but a smaller size. I just stuck a ground cover inside of it for the summer months and then I'll plant it this fall.

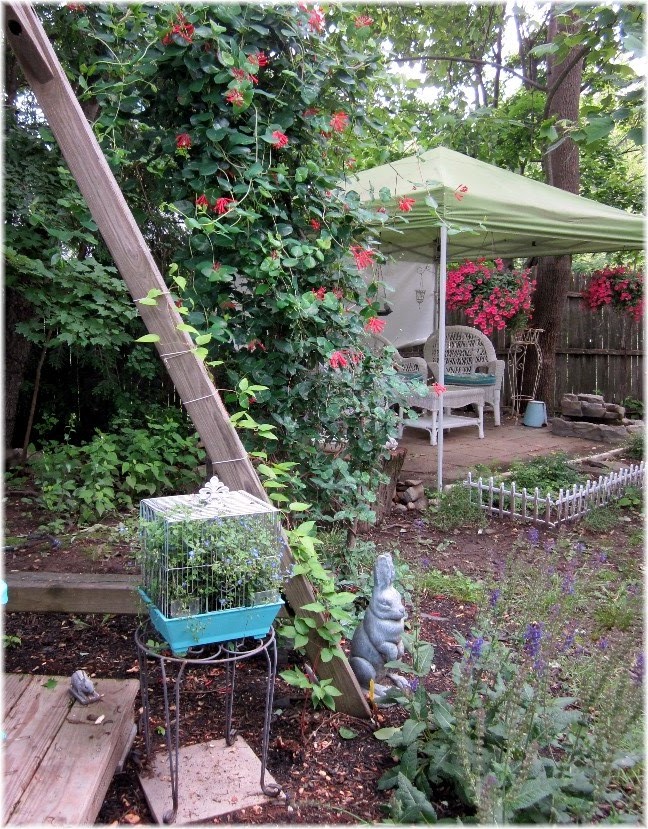
 I'll have to share before and after photos of our honeysucke vine in the background. We planted that to climb a homeade obelisk a few years ago and it has done amazingly well in this spot! (The hummers agree!)

If you need more info on making birdcage planters, I have a DIY link on my sidebar that gives a bit more information. Check it out if you have any questions!

Enjoy the weekend, everyone!

I'm hooking up to My Romantic Home's Show & Tell Friday this week.

Donna


Wednesday, June 9, 2010

Another bird cage planter!

In my last post I showed you what I did with my birdcage planter this summer.


I put it in our new swingset garden, using the same rusty white table that I've used in the past.
But this year, I broke all the home garden decorating rules and put (collective gasp!) FAUX ferns inside....

Last year, when it was up on the deck, it was filled with colorful flowers. (Here are the instructions on how I made mine.)


Ro Magnolia left me a comment that she had created her own birdcage planter after seeing mine. You must visit her at Soft Winds and Roses to see the birdcage planter she created out of this GORGEOUS old bird cage. Just look at the domed shape on top! An old beauty for sure! You'll love the transformation!!!

Donna

Wednesday, June 3, 2009

Summer Garden Tour

Welcome to my little summer garden tour, being hosted by the lovely Tracey of Notes from a Cottage Industry. Tracey, who also hosted last year's garden tour, thought it might be fun this year to "focus on one specific idea, or spot, or project in your outdoor area."

So, with that in mind, I thought I'd focus on a specific idea, mine being using things for purposes other than what they were intended for.

This little birdbath planter rusted so badly that I didn't dare use it as a birdbath any longer for fear of poisoning the birds...


So for the past several years I've been using it in various spots around the yard as a plant pedestal. I usually buy a nice hanging plant, remove the hanger, and plunk it right down on the rusty basin.


This idea works just as well for inexpensive plastic birdbaths that don't hold water anymore...


...due to cracked basins.

This is the cracked birdbath last year, up on the deck...

...but this year it's down on the patio, sporting a hanging fuschia to attract little hummingbirds (oops - still need to removed the hanger!)...
I have no idea what this is, but I call it "the white cage thingy." It's all enclosed so you can't even put anything inside of it - not even a little votive candle. I found it at the dump last year in the "free recycling" area. It consisted of this cage type structure, a long white chain, and a hanger. Conversation that day:

Hubby: Why are you taking that?

Me: I like it.

Hubby: What are you going to do with it?

Me: I don't know.

Hubby: That's why we have so much junk. You're always bringing things home that we don't need.

Me: I know, but it will be fabulous when I figure out what to do with it!

Introducing fabulous #1: The hanger thingy, which has a hook at the top, is perfect for hanging this petunia plant from the girls' old tree house! (See, hubby? I told you I'd figure out something!)

Introducing fabulous #2: I hung the white cage thingy and chain from a mulberry tree branch and then hung a plant from it. I think it looks kind of neat - and you sure can't beat free!!


Speaking of the tree house, I love using old windows around the yard. This one was the perfect size to dress up the "window" area of the old tree house. With a flower box hung underneath, it's a nice little focal point in this corner of our yard.

I also like to hang old windows on our stockade fence...

... with flowerboxes mounted underneath...

It's better than looking at a plain old fence as you go through the garden gate into the backyard, don't you think?


This is the screen feeder outside our dining room window...


We love to feed the birds during the long....

...COLD....

...snowy....


...New England winters...


But for the summer, I thought I'd put the screen feeder to work as a "planter" box (after all, there's plenty of natural food for the birds during the summer months!)... So I set some impatiens flats right on the screen (which should be fine because they're very light weight). As long as I water them daily I'm hoping they'll do just fine!


The same view taken just a few months ago in March 2009... I like the view now soooooooooo much better!!!
Speaking of long, cold New England winters, we lost a major portion of a couple of our trees during an ice storm this past winter... Before the trees were cut up and removed, I told hubby I wanted to keep some branches because I had a project in mind for the summer... (Hubby: Oh no, here we go again)...

So this past weekend we built a very rustic obelisk...

...out of four branches to support a honeysuckle vine we bought a couple of weeks ago (gotta keep those little hummers happy!)....

Right now it looks like a giant unfinished teepee, but hopefully within a few years it will be covered with that beautiful honeysuckle vine!


We staked each of the four branches to the ground with long spikes so it will withstand the strong winds we get sometimes!


And as I've posted about recently, this is the birdcage planter I put together for our deck. If you've read my blog before, you know I have a big thing for birdcages (it goes back to wonderful memories from the 50's of my beautiful Nana and her parakeets)...

So last month, when I spotted this birdcage on the roadside at a yard sale that was just closing down, I knew I'd found the perfect cage for my outdoor garden project! (if you'd like to learn how to make one of your own - and avoid making some of the mistakes I made along the way - click here)...


I love finding fun uses for things, other than what they were intended for! I hope you enjoyed your visit to our little cottage and "garden in the making." It's always a work-in-progress around here!
Now be sure to visit Tracey's garden and all the bloggers giving "garden tours" today!


Happy summer everyone!!!


Donna

Monday, May 18, 2009

Create a birdcage planter for your patio...

As some of you may already know, I love (am obsessed with) using bird cages to decorate inside our little home... But lately I've been on the lookout for just the right cage to use outside in the yard...

(click any photos to enlarge)

On a trip to New Hampshire a few weeks ago, I happened upon a yard sale that was just shutting down. I made a quick U-turn because this beautiful blue cage caught my eye... It's not vintage, and it's not in the greatest condition, but it was perfect for what I had in mind...


... so for a couple of dollars, this pretty cage came home with me! (I still can't believe it hadn't been scooped up early on in the yard sale!) Let me show you how it started out, and how I put everything together... Maybe you can learn from my (many) mistakes if you decide to make one of your own. I'm also going to list this on Susan's (Between Naps on the Porch) Met Monday. Be sure to visit her blog to see some amazing room-by-room transformations done on an antique home and to find a list of other bloggers with incredible before and after transformations!

Step 1 - Find a cage


Look past dirt.. (Picture it after it's been cleaned up!).

Step 2: Find a table or base (optional)


I got out a few of my garden/patio tables...


...and found one that was the perfect size for the cage to rest on.

Note: With the combined weight of wet plants and a garden statue (even a resin one), I wouldn't recommend hanging the birdcage as I don't think the cage/base attachment system is all that sturdy. I know with mine, I'd always be in fear of the bottom falling out and everything crashing to the ground on top of one of my little Chips (chipmunks) or Sammies (squirrels)!

Step 3: Choose your garden statue


I thought this rascally rabbit might look good in the cage (but as you can see from my first 2 photos, he didn't like living in a cage and was replaced with Mrs. Bird!!)


Here's where you can start learning from my mistakes (many of which you'll see in the following photos).


1) If your cage comes with a tray, remove it. That way, when you water your plants, the water will run out through the slide-out tray opening, rather than sitting in the tray (mine has since been removed, although not until after I took these photos)....


2) The same goes for any feeders or water cups. Remove them because, like the tray, water just sits in them after you water the flowers (again, mine were removed after taking these photos). After all, the end result should be a beautiful patio decoration, not a romantic mosquito breeding ground...


3) Since my cage had a large/tall base, I decided to place my garden statue on a suet feeder to raise it up and give it some height. Unfortunately, I didn't pay any attention to how tall that ultimately made the statue; therefore, after arranging all the flowers around it and getting ready to attach the cage to the base, the rabbit ended up being too tall for the cage (which meant taking everything apart to remove the suet feeder, and then starting all over again). So measure the height of your garden statue to make sure it will fit before arranging flowers all around it!!

Step 4: Start arranging your flowers


I decided to put trailing flowers in the four corners (I chose a petunia type flower called Calibrachoa, color Caloha Pink)...


Doesn't it look pretty against the blue base?


I then filled up the rest of the base with impatiens and double impatiens in an assortment of colors...


I left all flowers in their original containers, just snipping apart 6 packs or whatnot (if necessary) to make them fit, and then just placing them in the base. (I've done this in past years in other containers and have always had good luck as long as everything is watered on a daily basis... I'll let you know at summer's end how it worked on this project!!)


It was then time to carefully attach the cage to the base. I gently pulled the trailing flowers through the corners, first trying to do so with my hand reaching through the little cage door (which didn't go too well!) and then with the cage slightly tilted back before attaching it to the base... and that brings me to another HUGE mistake that I made - one that would have made things SO much simpler!


How did I not notice that this particular cage not only attaches at the base, but also has a 'lift off roof' that can be removed?????
If I had only know that, I would have arranged all the flowers (especially the trailing corner flowers) with the cage sides intact so that I'd only have had to attach the roof when done (rather than painstakingly being so careful not to crimp or crush any flowers while attaching the cage to the base)... I've never had a cage where the 'roof' was removable, so I'm guessing that's a more modern feature (I'm so used to the old vintage style birdcages)...


But in the end, it all worked out and I'm happy to report that Mrs. Bird is much more cheerful about living in the cage than Rascally Rabbit was. (The last I saw him, he was down in the yard hopping around after the pink flamingos!)
NOTE: Make sure that the cage door
is securely closed so that no poor
creature (bird, chipmunk, etc.) is
able to enter the cage through an
unsecured door, only to have
it close behind them, thereby
trapping them inside the cage.
(Okay, this is the second bold case 'warning' I've issued in this one little post [about a decorative bird cage, no less!!]... Blogging definitely promotes self-awareness and self-realization. As I read back through my post, I'm beginning to see why my girls call me "the worrier." It's clear I have earned that title and do, indeed, worry about every little thing - and to excess, I might add. A little worry is a good thing; it keeps us safe; but anything done to excess is not healthy and this is definitely something I need to work on!!! Okay, end of self-realization moment...)

We are having a major mess with all the oak catkins in our yard... Maybe I'll get some pictures of them to share with you in an upcoming post. I'll sure be glad when they're done falling!!
Wishing you all a lovely week!
Donna